- Cut three lengths of wire to 20, 15, and 5 feet in length.
Lay the 15- and 5-foot wires next to the 20-foot wire so that only two wires are next to each other.
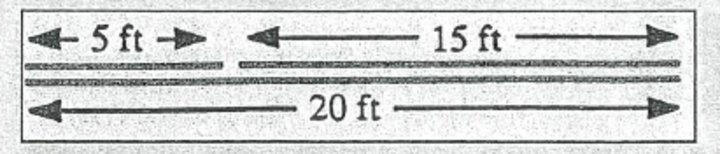
- Bind these two wires together by wrapping a short piece of electrical tape around both wires at about 6-inch intervals. Leave 6 inches of wire free where there is a cut end.
- Plug in soldering iron or soldering gun.
- Strip 1/2-inch insulation form all cut wire ends. Note that there are six cut ends to be stripped.
- Identify which wire will have an alligator clip attached. Remove one insulator from each of four alligator clips and slide insulator onto the wire ends where alligator clips will be attached. Push the alligator clip insulator back about 6 inches form the bare wire.
Removal of the alligator clip insulator should expose a small hole in the clip. Insert the exposed copper wire into the hole and solder the wire to the alligator clip as shown in the drawing. Alligator clips are attached to only four out of six of the bare copper wire ends (ends to be attached to the igniter and battery).
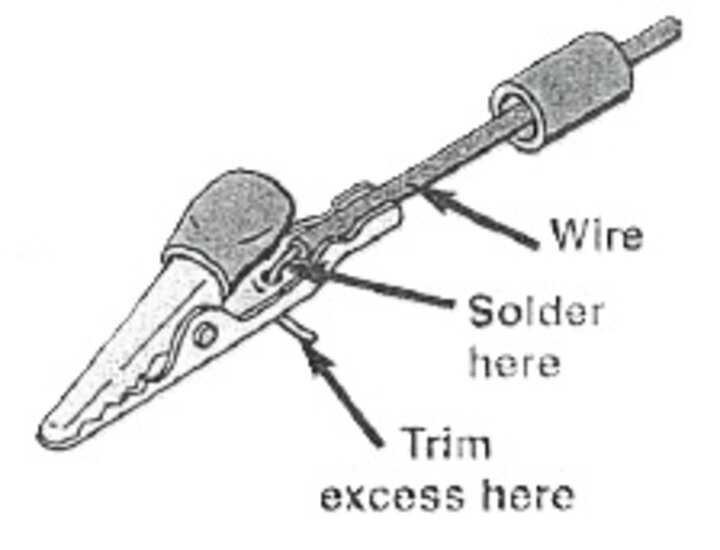
- Trim the excess copper wire from alligator clips.
- After the alligator clips have cooled, slide the insulator onto the alligator clip so the bare wire is covered.
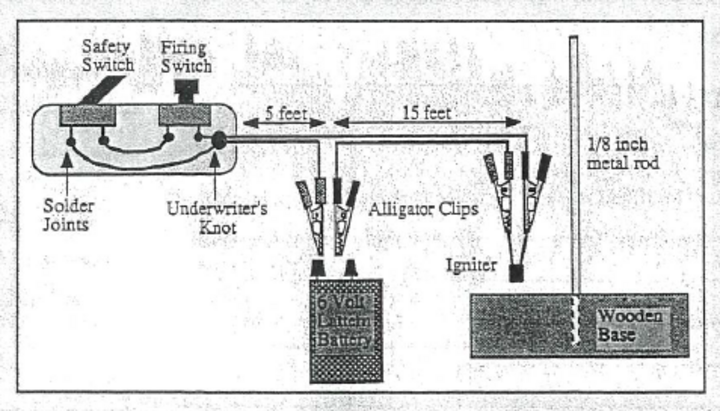
The Control Box
The following steps will explain the preparation of the control box.
- Drill 1 1/4-inch hole in one side of the plastic control box. This will be the entry point for the wires.
- Drill a hole large enough for the threaded section of each switch to fit through the top of the box.
- Remove the nut from the threads of each switch.
Insert each switch into its hole.
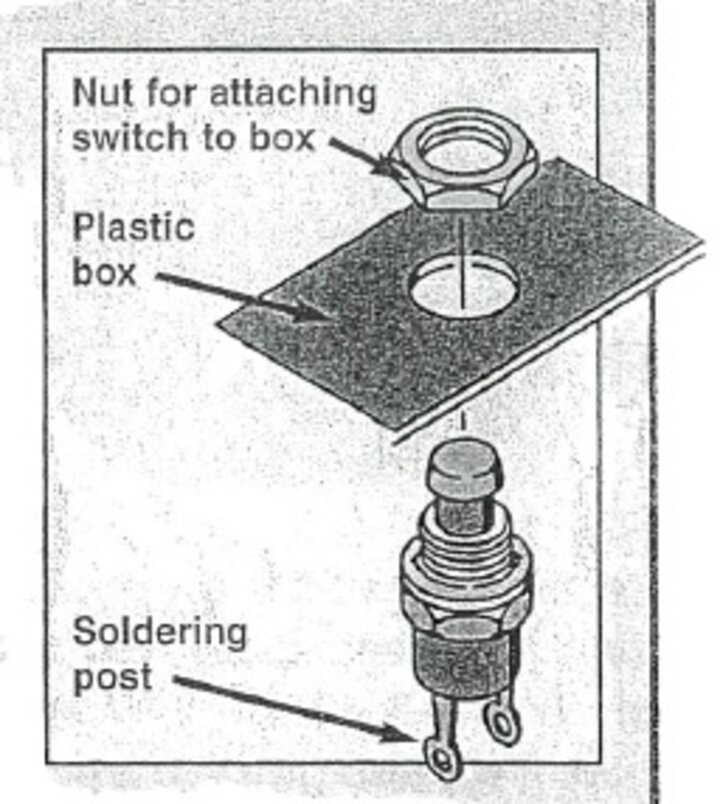
- Thread the nut onto the switch until it is held tight.
- Insert the two wires through the hole in the box's side.
- Tie an Underwriter's Knot and check to see if it will not pull through the hole.
- Solder each wire to its appropriate soldering post.
- Cut a 4-inch piece of wire.
- Remove 1/2-inch of insulation form ends of the 4-inch wire.
- Solder the 4-inch wire to the appropriate soldering posts.
- Attach the bottom of the box.
The Launch Pad
The following steps will cover the Launch Pad preparation.
- Cut a 2 x 6-inch piece of lumber 5.5 inches long.
- Drill a 1/8-inch hole in the center of the board.
- Insert the 1/8-inch metal rod into the hole.
- It is best not to stain, varnish or paint the wood base or metal rod. These materials may be combustible. To protect the wood you may use aluminum foil.
Acknowledgment: Adopted with permission for NRAES 4-H Electric publication.